I was recently asked to take part in the Wayfair DIY Challenge. Wayfair has anything you could ever dream of for the home. Of three different items, I chose the Furinno Espresso Living Coffee Table and was asked to transform it with my own style. We have a bonus room that serves many purposes. It is part playroom and part family hangout space. We have never had a coffee table in the room but now that our kiddos are getting older, the time has come! I ended up creating a reversible coffee table. One side boasts stripes for when we entertain and watch movies and the other side sports a checker board for chess & checkers. And get cozy as this post is anything but short!  ……………………… the before
 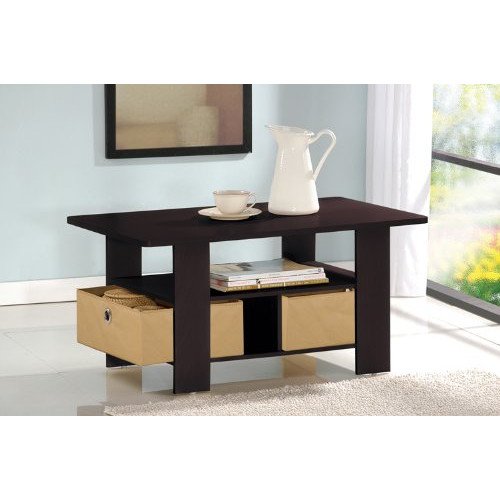 …………………………. the after
  …………………….. the DIY how-to The first step was buying trim and a piece of plywood from the hardware store. I measured the top of the table and had the 1/4 inch plywood cut to those exact dimensions.
  I tend to stay away from power tools so I used this trusty box to cut the trim. That’s about all I can handle!
  Whitecap Gray {Pantone} was the perfect taupe color to paint the trim. I wanted the trim. Two coats did the trick. I painted the large piece of wood white on both sides {two coats} so that I would have a fresh white basecoat from which to work.
  I have an abnormal fear of nailguns so my husband nailed the trim to the sides of the table for me. I made sure the trim was raised higher than the table {just the amount of the wood piece so that everything would be flush once together}.
 To create the stripes, I measured out even spaces and taped them off. I gave the stripes two coats of paint using the Pantone color { Whitecap Gray }. I really like this paint for projects. After the second coat of paint, I peeled the tape off immediately to ensure clean lines.
  I wanted to keep some of the table in the dark espresso finish as it matches the Expedits we have in the room. But to add some character to the shelf, I had a piece of acrylic cut to the exact proportions. I then used leftover fabric I had to place under the acrylic.
  To eliminate raw edges, I measured 1/2 inch larger on each side and then ironed over the hem and used iron on fuse tape. That stuff is so amazing for projects like this.
 ")
") I like the print that pops through and love that we can set anything down there and it won’t hurt the table.
I like the print that pops through and love that we can set anything down there and it won’t hurt the table.  and another look at the before version of the table
  And I chose stripes so they would mimic the wall treatment I have behind the couch. I chose to keep the baskets as they were since the khaki color ties in so nicely with the room.


 When it is time to flip over the table you simply push your finger through a hole I drilled in the top of the table. By doing so, it pops the striped top up and you can flip it over to reveal the game table side.
  …………………………… ta- da!
  I gave both sides of the table three coats of poly-acrylic. The drying time in between coats on that is two hours so it was a long {but easy} process. I figure it will payoff as it is easy to wipe down and will protect the paint job.
  To make the checkerboard, I was pretty old school about it. I marked off an area that was 16 inches by 16 inches. This allows for a board with 64 squares { 8 x 8 } all measuring two inches. There is painter’s tape that is exactly 2” that I didn’t stumble upon in my garage until it was too late. That would have made the process a piece of cake. So after drawing the grid, you tape off half the squares to paint them. I peeled the tape off as soon as I gave it a second coat. Simple craft paint is all that I used.
  I picked up a stencil from a local craft store to add detail to each side of the board. I taped it down and used two coats of yellow craft paint. Each coat was very light so as not to bleed under the stencil.
  Once the squares were done, I taped off a very tiny line around the entire checkerboard to define the space. This allowed me to keep half of the squares white. I painted the trim around the board in yellow.


 And here is one last look of it with the striped side of the table showing. The kids are learning to play chess from their daddy. I have no clue how to play so I am sure these pieces are not where they are supposed to be! I will learn some day {in my free time!}.
  I am thankful to Wayfair for asking me to participate in this DIY challenge because we are now enjoying our new coffee/game table! You can follow Wayfair on Pinterest and Facebook to see more of their products! …………………….. {I was compensated by Wayfair in the form of a gift card from Giftcards.com to purchase the supplies for this project. All opinions are 100% my own. }
WOW! That's a pretty awesome DIY project!! Love it!
Wow! You definitely rose to the challenge! It looks so much better and how fun to flip it around and have a game to play! Good job!
Very creative! Where do you get these ideas?!
This looks amazing! I love how you were able to make the table multi-functional! I had fun participating in the challenge as well! I can't wait to see all the other projects.
Amazing! I love the paint job and the reversibility…works so perfectly in your playroom!
That is such a fun project! So you mind giving us the budget breakdown? I'd love to know if this was feasible for me to do.
The entire thing looks so great but I'm especially loving the game side. Great idea!
Wow, what an awesome project! You killed it and I love how it doubles as a game table!
This is seriously amazing girl!
Way to go. This looks amazing! Who knew there was a board game under there.
Lura
x
Amazing!
Anna
Love the versatility of the table! Good job!
Are you serious, C?! You always hit it out of the park. This is great. Stylish, fun and of course I love that you did it yourself (but it sure doesn't look like a "craft project"!)
You did such a great job with this! Fingers crossed that I finish mine today – YIKES!
Fabulous and fun Courtney! Great table. I love that your kids are learning to play chess, too. I could never sit still long enough to learn when I was young. I still need to learn how to play!
What a great idea! I seriously don't think I ever would have thought to have the table be double-sided for different purposes. Way to go!! 🙂
Now THAT is an incredible idea! I love the versatility and that it is a chic table by day, game table by night! Genius my friend! And of course, it is styled beautifully!
xo!
Jen
i love this idea of making the coffee table a game table! i might just have to do something like this…thanks for the idea! 🙂
I absolutely love the table! That is so cute and clever! Great job! 🙂
Amazing! I love it. Quick question.. how does the table flip to the other side? I don't see the hole you drilled on top (on the finished table).
Oh my goodness…you're SO creative!! The coffee table looks 1000x better now!! And much more functional too!
Daaaaang girl, that is a lot of work! great job, and so fun to have a game table top!!! I'm impressed you even own a nail gun, I think I need one. for John to use. 😉
Wow! That came out fantastic! I especially love that it's a game board too- totally genius! It looks 100 times better than the original.
You did a great job on that little table! You've inspired me to do something with the big, heavy, old table we have in the basement living area.
LOVE what you did with the game board. Smart cookie! It looks a million times better than the original.
Such a clever idea! Just pinned it 🙂
xo
cristin
I am just catching up on blog reading, and I have so much to say! First of all, you look stunning in your Chicago pictures! Perfect outfits! 🙂 Secondly, I l-o-v-e this table!! What a fun idea! You took the challenge to a whole other level, and it looks incredible! Good job!
Way fair diy challenge is shown on the post here. Read to know more
Bean Bags
I am a bit delayed on this…but WOW!! So beautiful!! Great job.