Today is the day. This is your complete step by step guide to limewash a stacked stone fireplace. I promise it’s a very doable project. In fact, we did this in just three half days. I hope this encourages you to take an element in your home that you may not love and really give it new life. We are so thrilled with the results and encourage anyone thinking about this project to jump in. Without further ado, let’s learn how to limewash your stacked stone fireplace.
CAN YOU LIMEWASH STACKED STONE?
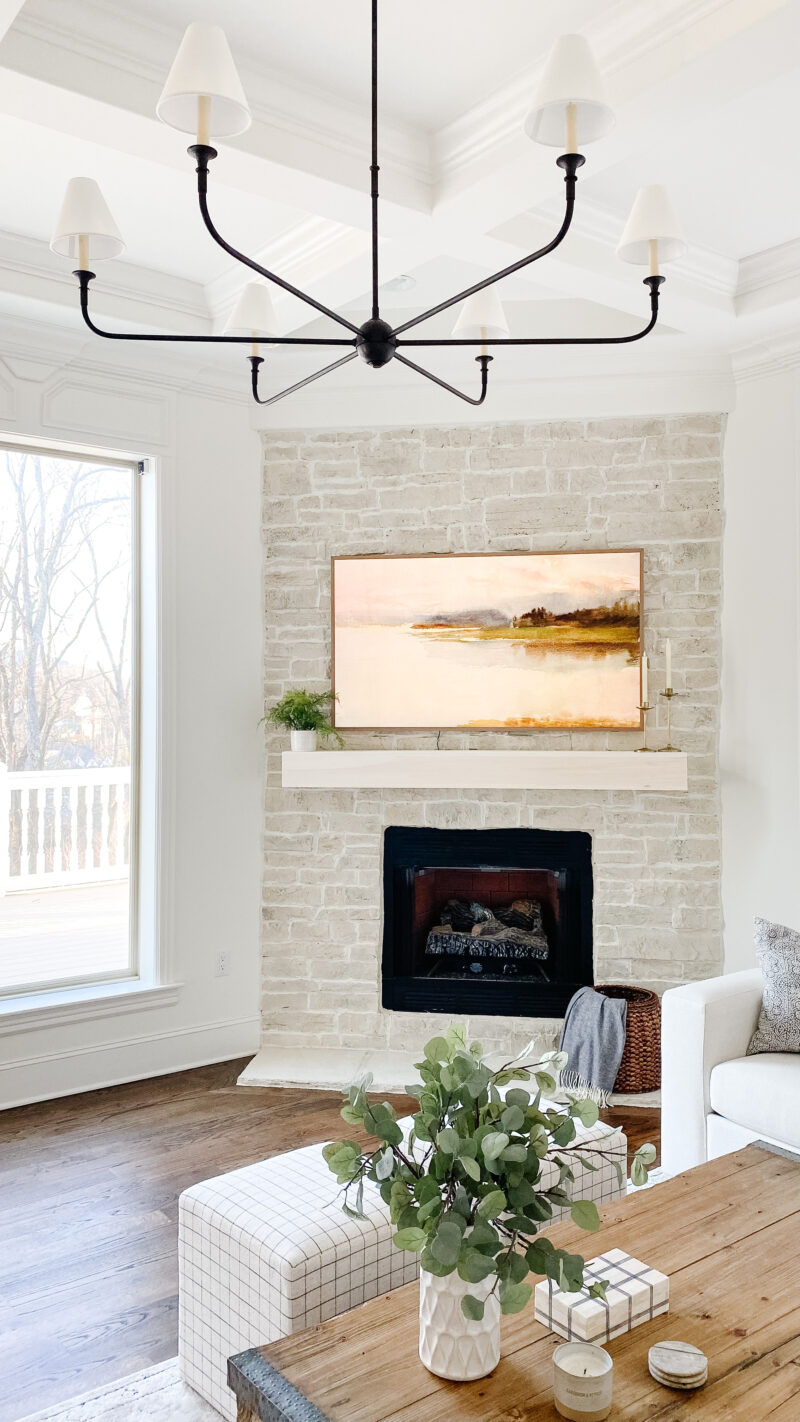
The answer is yes. You can absolutely limewash stacked stone. It’s always fun to start with the reveal. We couldn’t be happier with the outcome. We still need to drill a hole for the Frame TV cable and stain the mantel. The mantel is hollow to allow for the TV box to sit inside. I love that I can switch up this artwork whenever I want.
SHOULD I UPDATE MY STACKED STONE FIREPLACE?
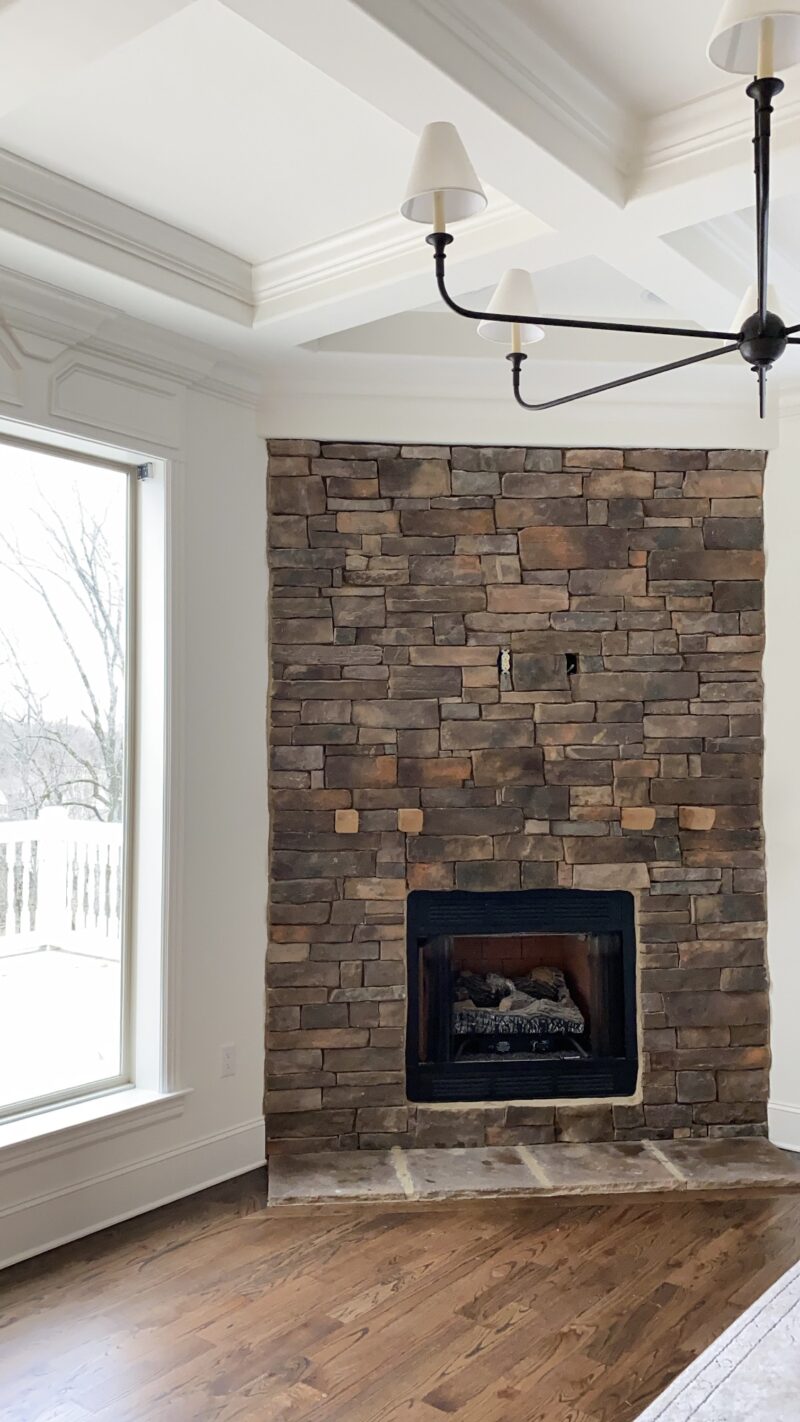
This question can only be answered by you. Natural stone is beautiful and it sure is having a moment right now. At the end fo the day, our stone was not real and we just didn’t love it. We felt that it added to much weigh to the our living room. The quote to have a professional limewash this (grouting not included) was $1000. We were able to tackle this entire makeover (including grout and supplies) for under $200. While it was three days of sweat equity it was absolutely worth it. This technique would also work on a brick fireplace.
We did use professionals to do this treatment to our exterior stone so we knew we would like the outcome.
PREP WORK
- Clean the stone. Before you jump into painting, feel the stone. Is it dusty? If so, wipe with a damp cloth. Because the fireplace is inside, it should be rather clean. Ours was dusty from when we refinished the wood floors.
- Tape off the surrounding walls with paper. A roll of brown paper worked for us.
- Cover the hearth and nearby floor with a dropcloth.
- Turn on some great music. That’s what got me through the project.
THE SUPPLIES
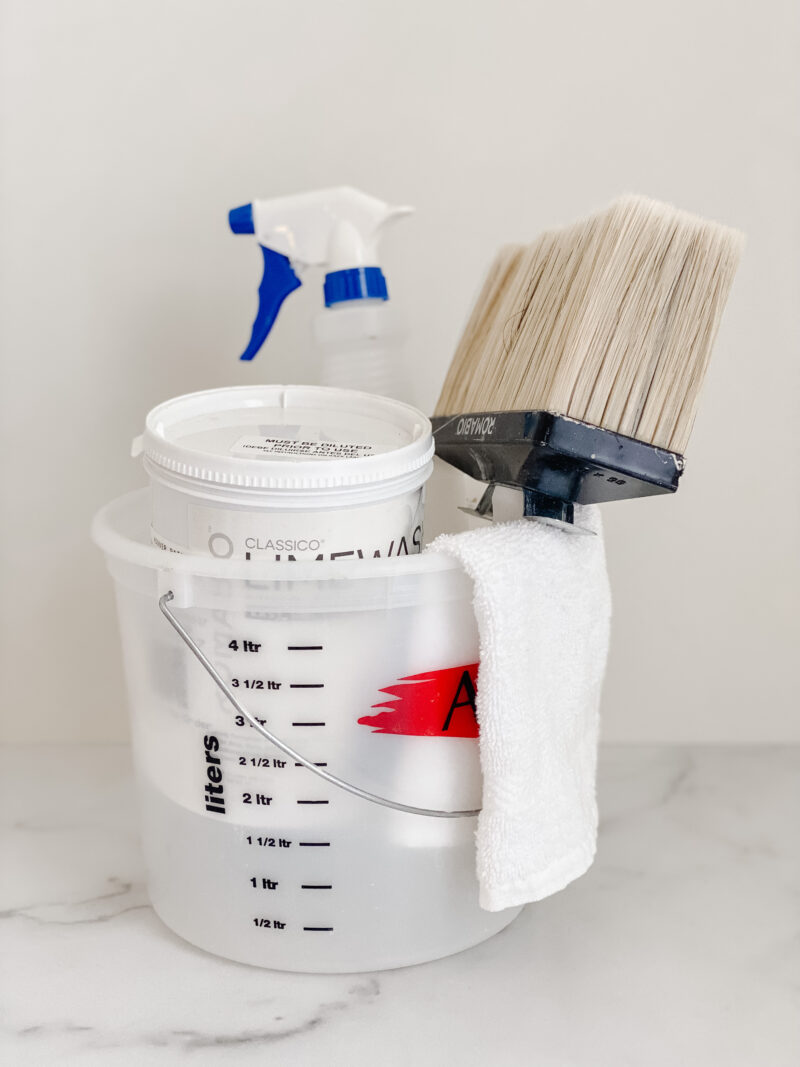
Meet your new best friends. This is pretty much all you need to limewash the stone, but they are all very important.
- plastic bucket
- multiple white rags
- large Romabio paint brush
- spray bottle filled with water
- Romabio Classico Limewash paint tinted to the color of your choice
- gloves to protect your hands
ABOUT THE LIMEWASH
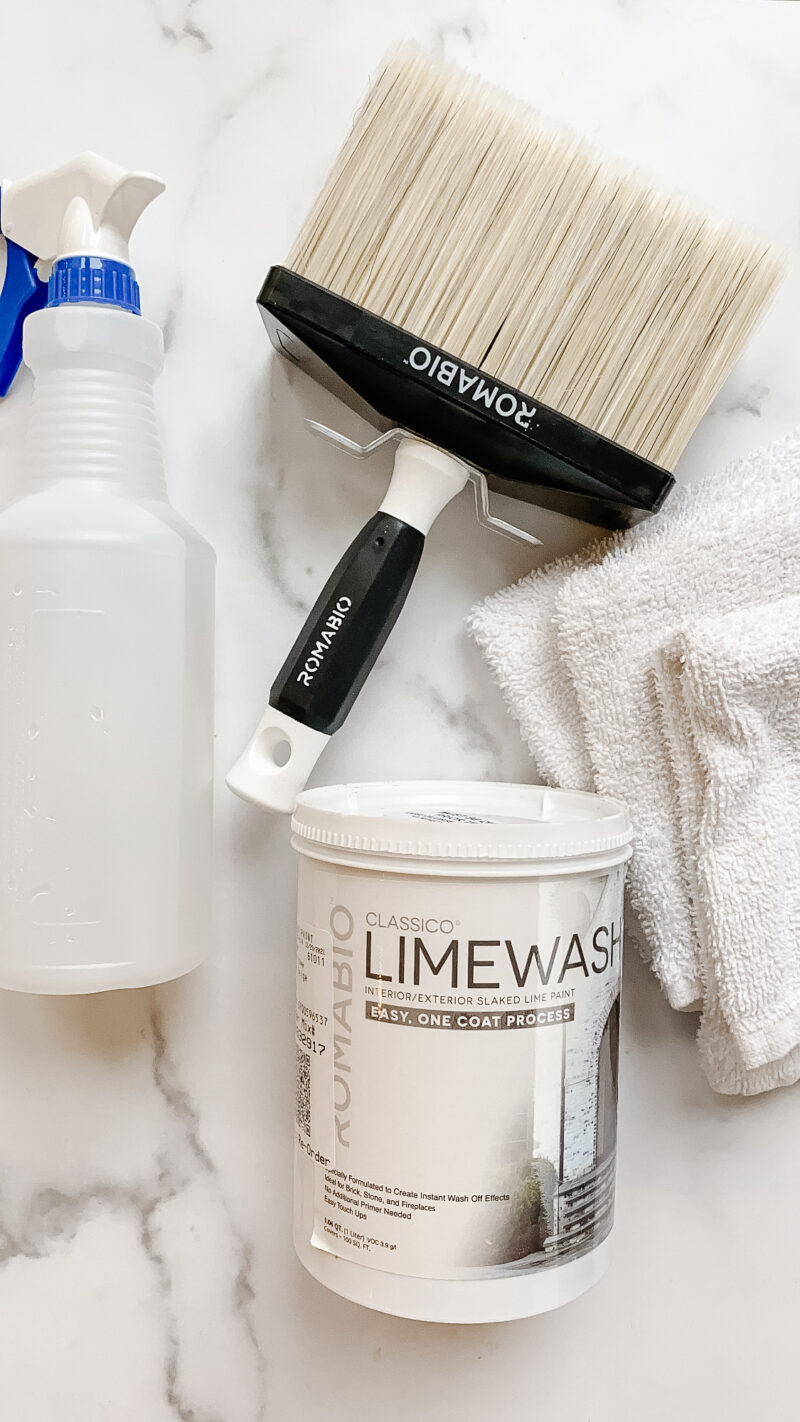
Romabio created this limewash product and it’s not only organic but free of any fumes or smells. It cleans up beautifully and was a dream to work with. We used the Classico Limewash tinted Riposo Beige. We love the soft beige color but you can choose to tint it any color you like. Just call around to find which of you local paint stores carry this. That store should also carry the large brush. It was very necessary.
DILUTE THE LIMEWASH
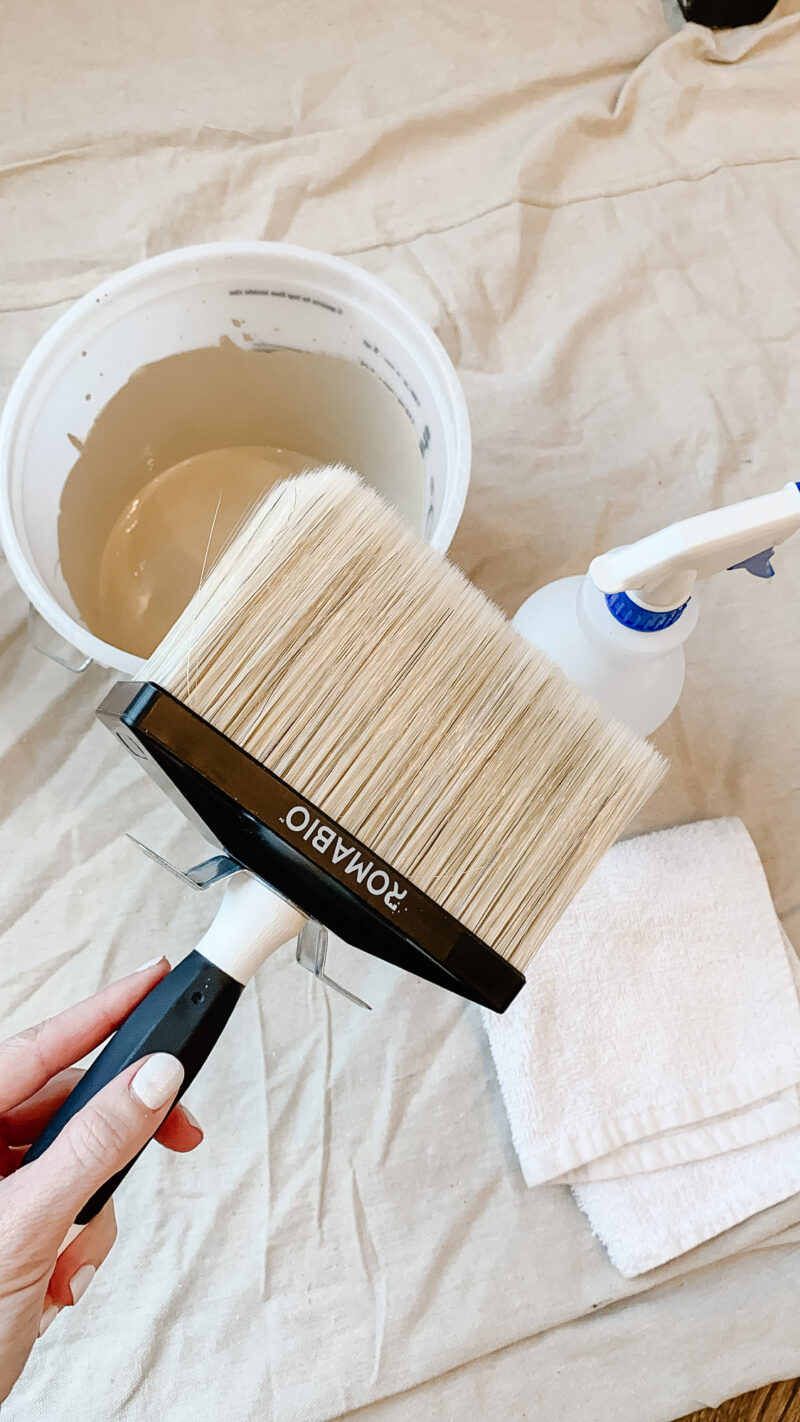
You need to dilute this product. They recommend diluting it 50-100%. We started with just one cup of paint and 1/2 cup of water. Looking back, I wish we had added 3/4 cup of water. I did the second day and it was not only easier to paint with, but much faster. But this is the part that is trial and error. It is a messy paint and will be dripping while you do it. That’s ok. It’s just the process. And you’ve covered your floors so no worries. Just keep track of your proportions so you can replicate as you go. We chose to only add one cup of paint with the water until it was gone. Then we mixed more. I just didn’t want to waste it and I wasn’t sure how much we would go through.
THE FIVE SIMPLE STEPS
- spray a section of stone with water
- apply limewash with the brush
- let dry 10-60 minutes (I waited 20-30)
- spray with water again
- use a rag to distress to your liking
1: SPRAY THE STONE WITH WATER
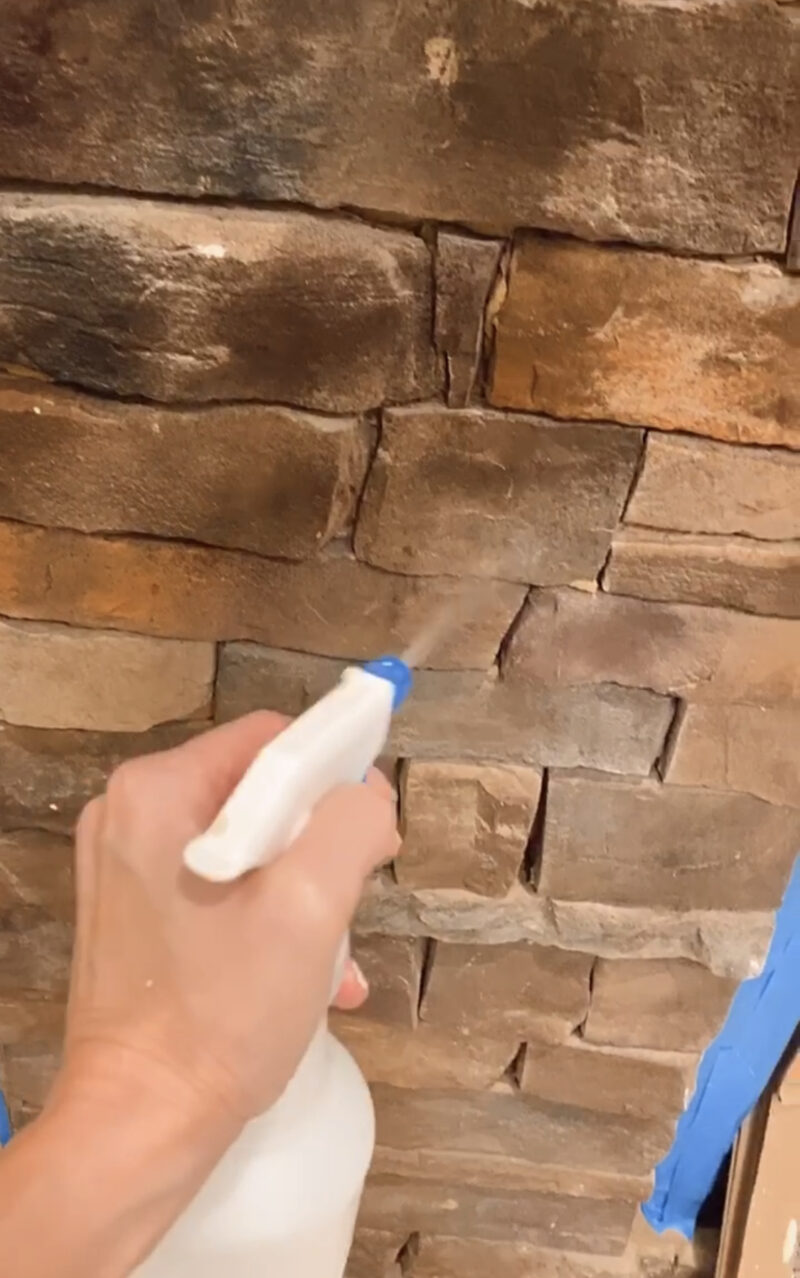
I listed the 5 step process above so you can reference. I worked in sections that were about 2 x 3 feet. Spray the stone with water. You want it to be damp but not dripping. Gently tap with a rag if it’s too wet.
2: BRUSH ON THE LIMEWASH
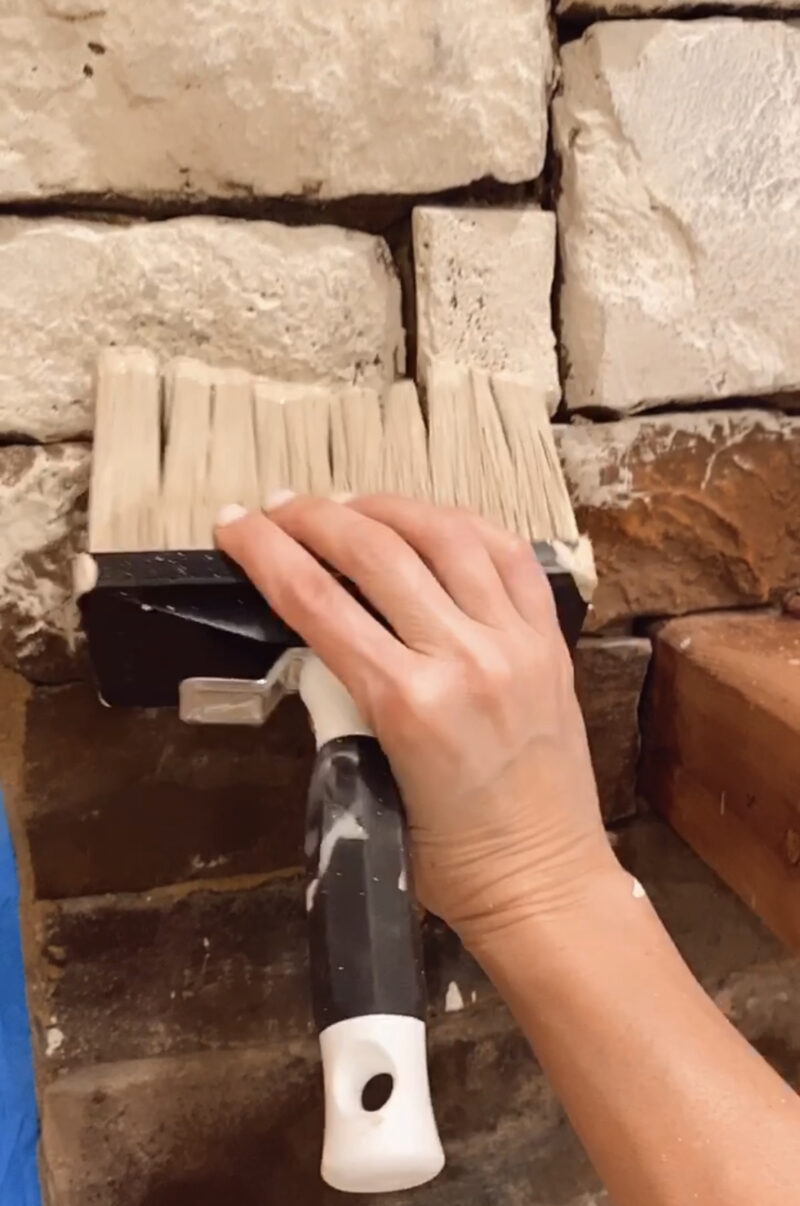
Dip your brush in the paint (a little goes a very long way) and start painting. Remember it is drippy and messy. That’s ok. Look at the tip of my paint brush. I only added about 1/2 inch of paint when I dipped the brush in the bucket. Don’t submerge the brush. You are really just working with the part of the brush that will meet the stone.
3: ALLOW LIMEWASH TO START DRYING
Wait 20-30 minutes. Grab yourself a snack. Or start another section if you want to be really efficient.
4: SPRAY WITH WATER AGAIN
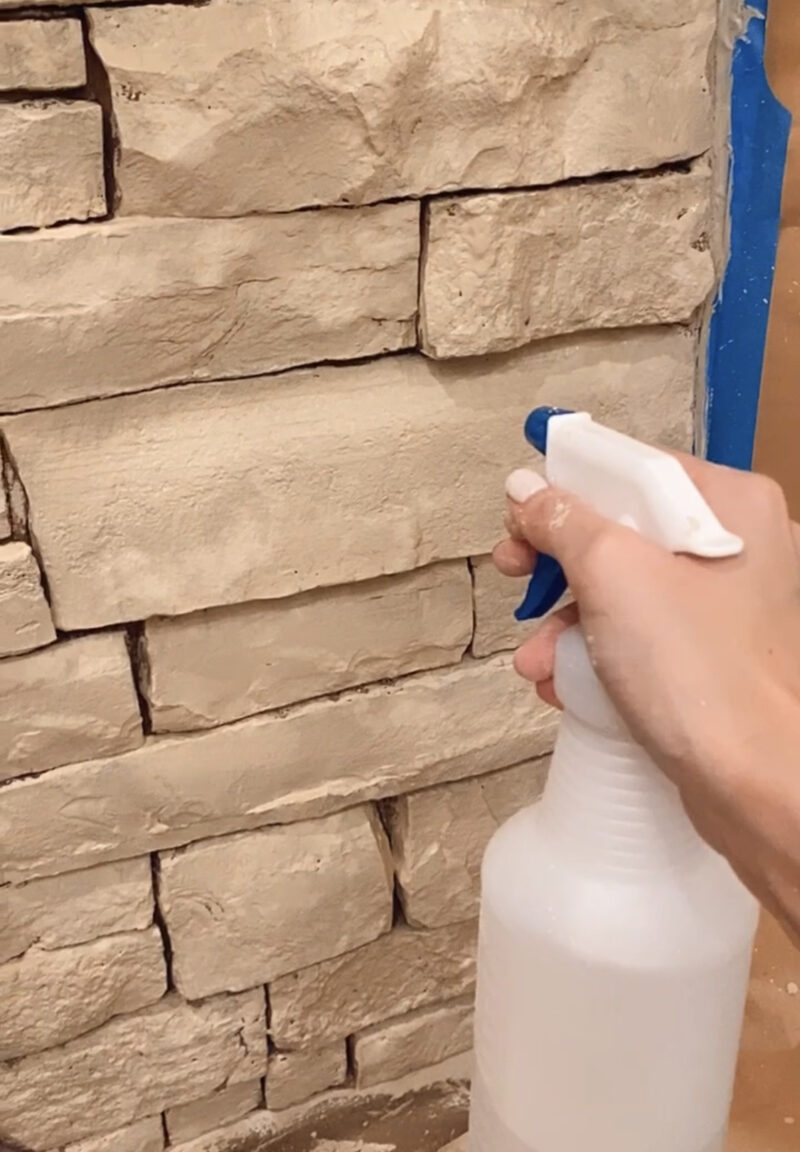
Return to the same section and spray with water.
5: DISTRESS WITH A RAG
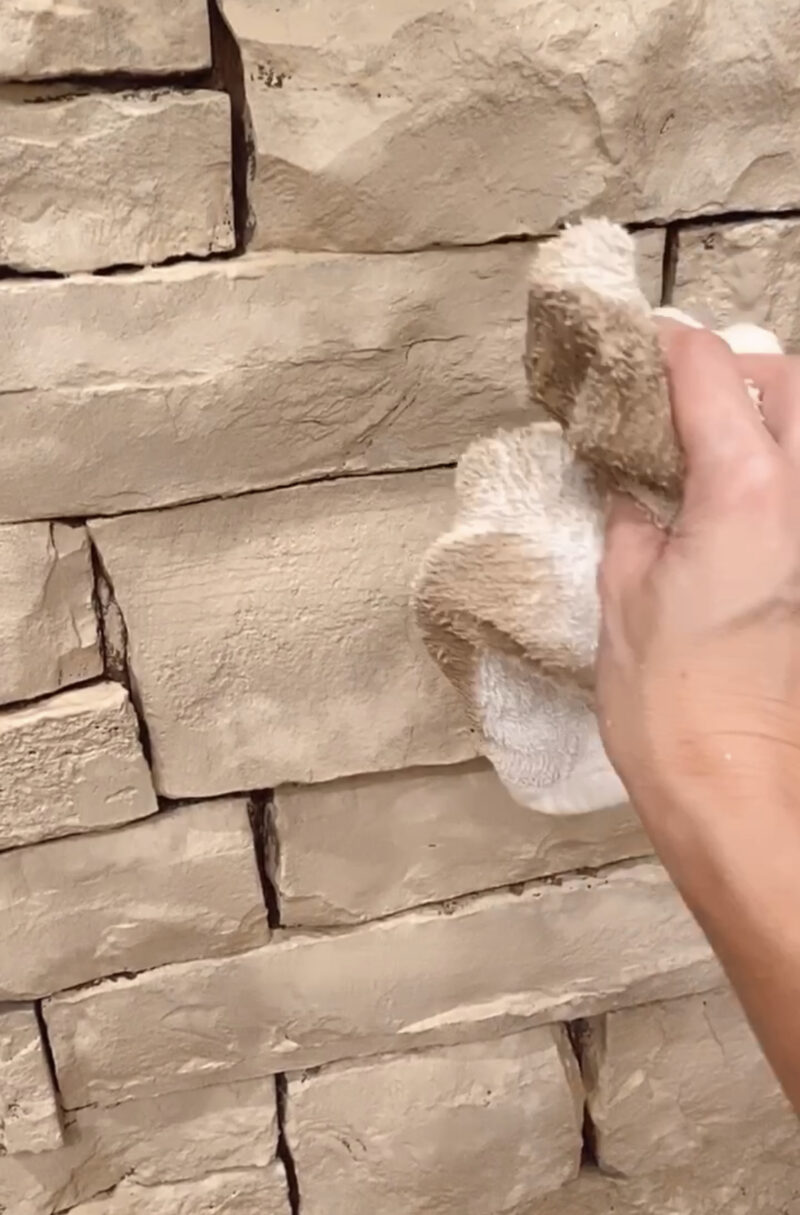
Next use a white rag and distress to your liking. This is a bit tricky as the paint looks more diaphanous when it is wet (it dries more opaque). Don’t be afraid to give it a good scrub if you want to bring back some of the color variation in the stone. If you dilute it at 75% you will probably see more of the color variation come through.
PRO TIP: Try one small section with the 5 step process. Allow to dry. See how you like it? If you love it, continue. If you want to tweak things (dilute with more water, distress more, etc) you can adjust moving forward.
This limewash is very forgiving. If you were using it on the outside of your home you could literally hose it off even after a couple of days. It really sets after five days. The problem is you can’t hose down your fireplace (unless it’s an outdoor one) so you want to test the process and then move forward. But know you are working with a very forgiving product so don’t stress too much.
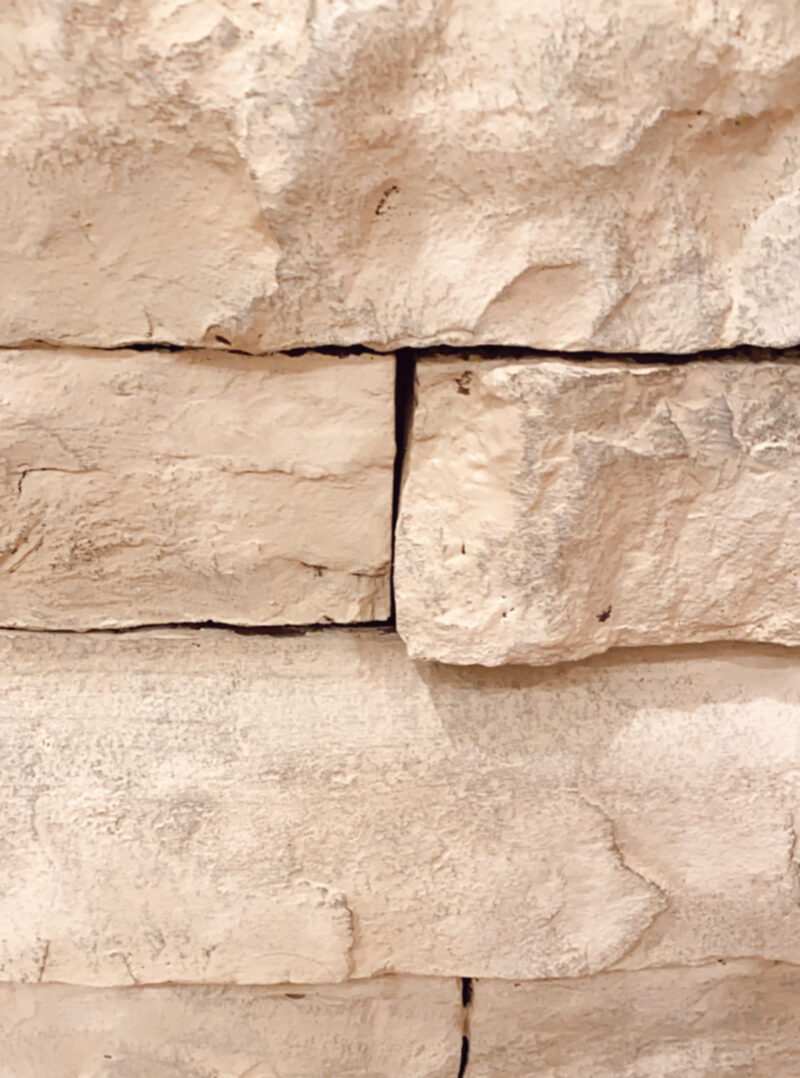
I really wanted some of the character and texture of the stones to come through. You can always use a little bit of sandpaper later on to scrape away a bit more paint. Worked really well for me. I wanted each stone to look a bit different.
PRO TIP: This pertains to later, but do you see how tight some of those gaps are? I still added a thick grout line over every gap. That is where overgrouting comes in. More on that below.
JUST JUMP IN
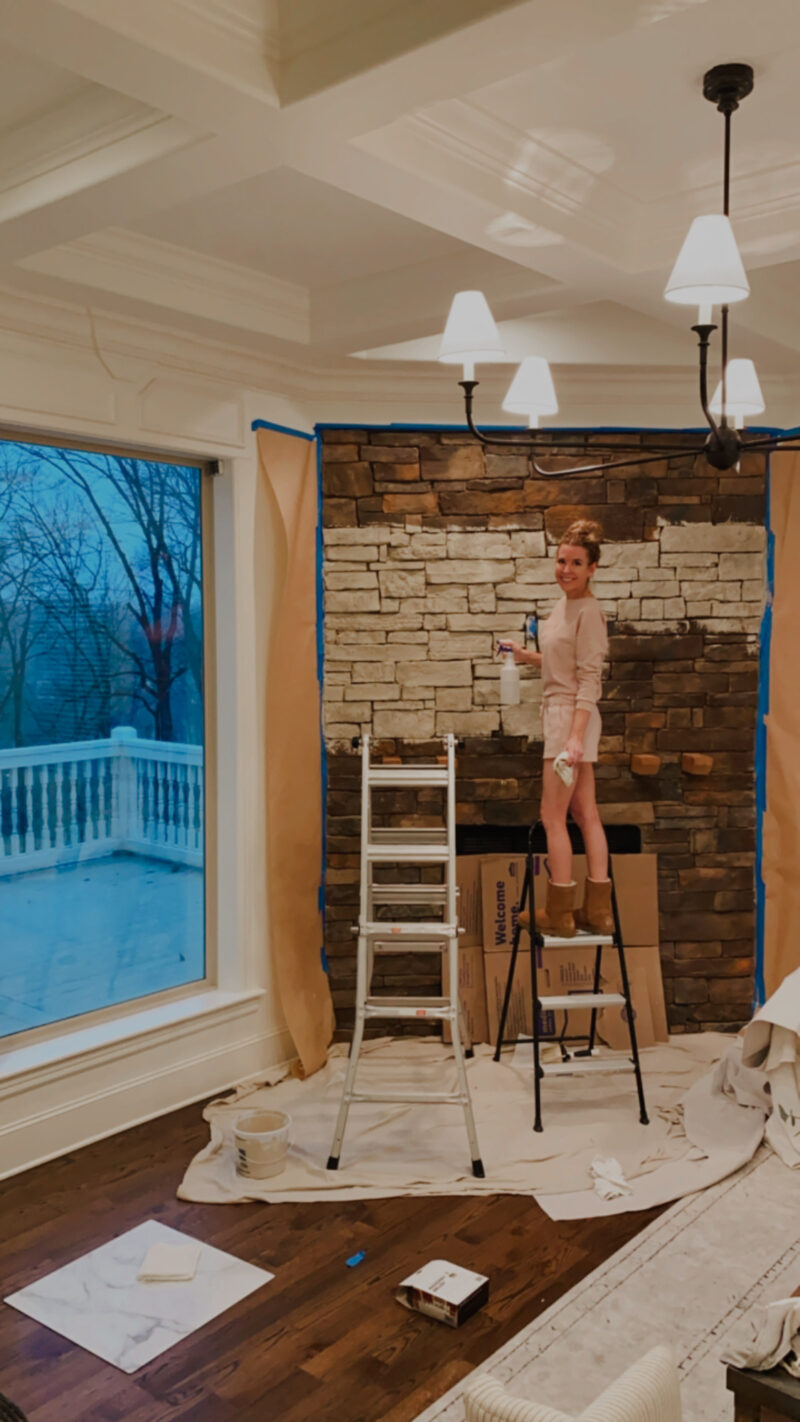
I literally woke up one morning and said, time to do the fireplace. So by the time I researched and bought my supplies it was 2:00 before I started. Soon it was evening and this girl was getting tired. But progress nonetheless.
END OF DAY ONE
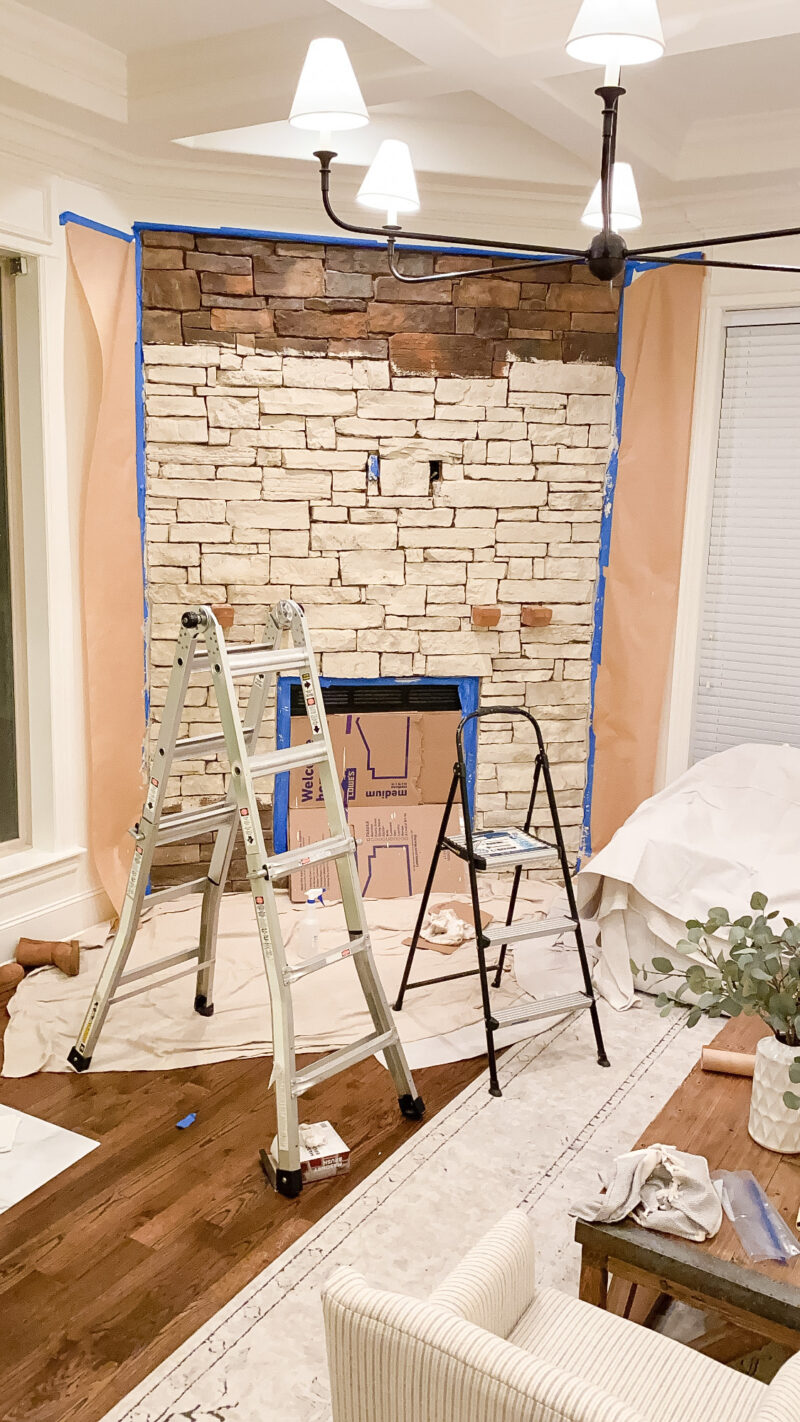
I called it quits at this point and actually panicked. I also poured a glass of wine. While I loved the limewash, I wasn’t loving how it looked without grout and thought I had ruined it. I even had one of my best friends give me a pep talk. She told me to see it through in the morning. This is your pep talk. I truly believe that the grout takes this to the next level. So keep on keeping on.
DO YOU NEED A PEP TALK YET?
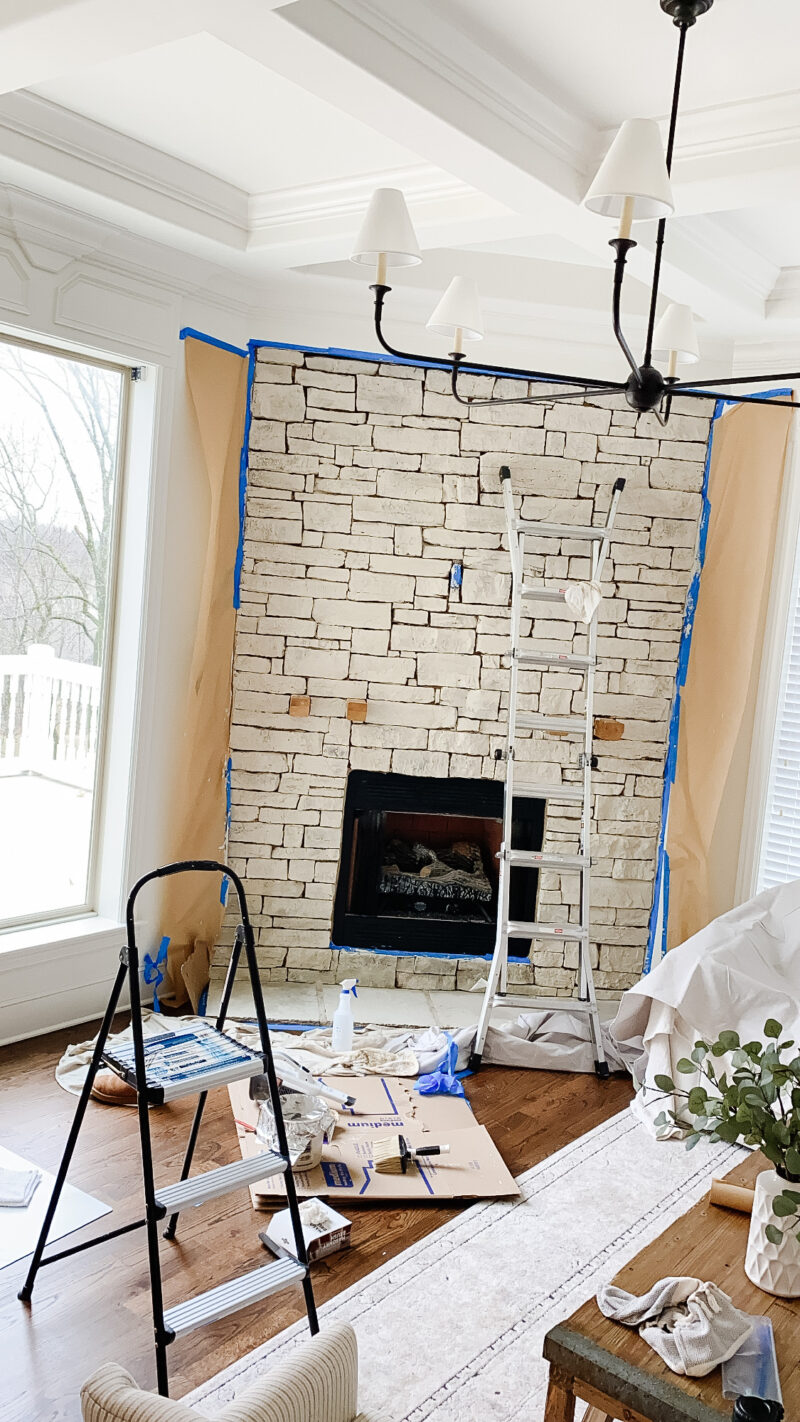
As I woke up the next morning, I still didn’t feel confident. It just looked so busy and those black shadow lines were not the look I was going for. After working so hard to limewash it, I was super discouraged. Sharing that in case you get to that point. The grout is magic. Pour some coffee and get back to work.
SHOULD I GROUT MY STACKED STONE?
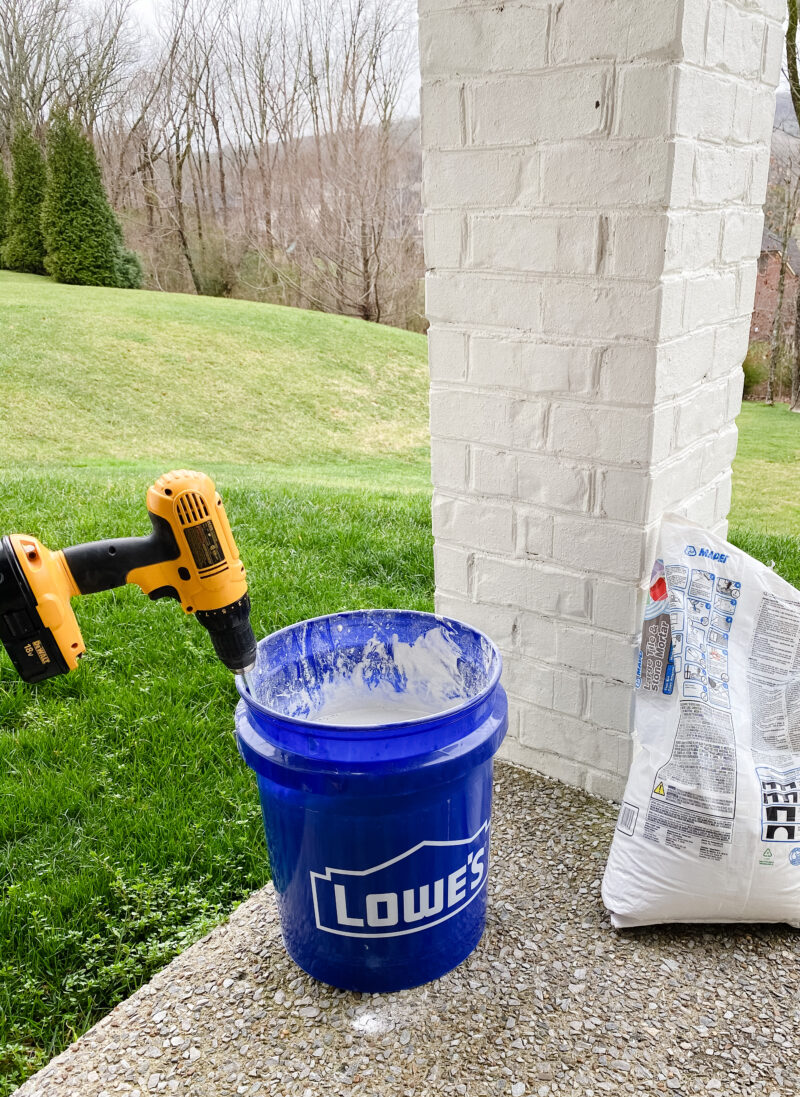
We think using mortar in between the stones made all of the difference in the world. It instantly removes the black shadow lines and creates a smoother stone finish.
My advice is to grout the next day. It’s time consuming and tedious so you want to be well rested. There is nothing difficult about grouting, it’s just tiring. My husband mixed the mortar for me. You’ll need a large bucket and a way to mix it (he bought an attachment for his drill). This part can be a bit messy.
You are looking for the mixture to have the consistency of peanut butter or frosting. It should be thick but easily spreadable.
We used Mapei Large Tile and Stone Mortar in white. The mortar is a bit stinky so if you are worried about smell, this is the part that has that. It never bothered me, but it’s worth mentioning.
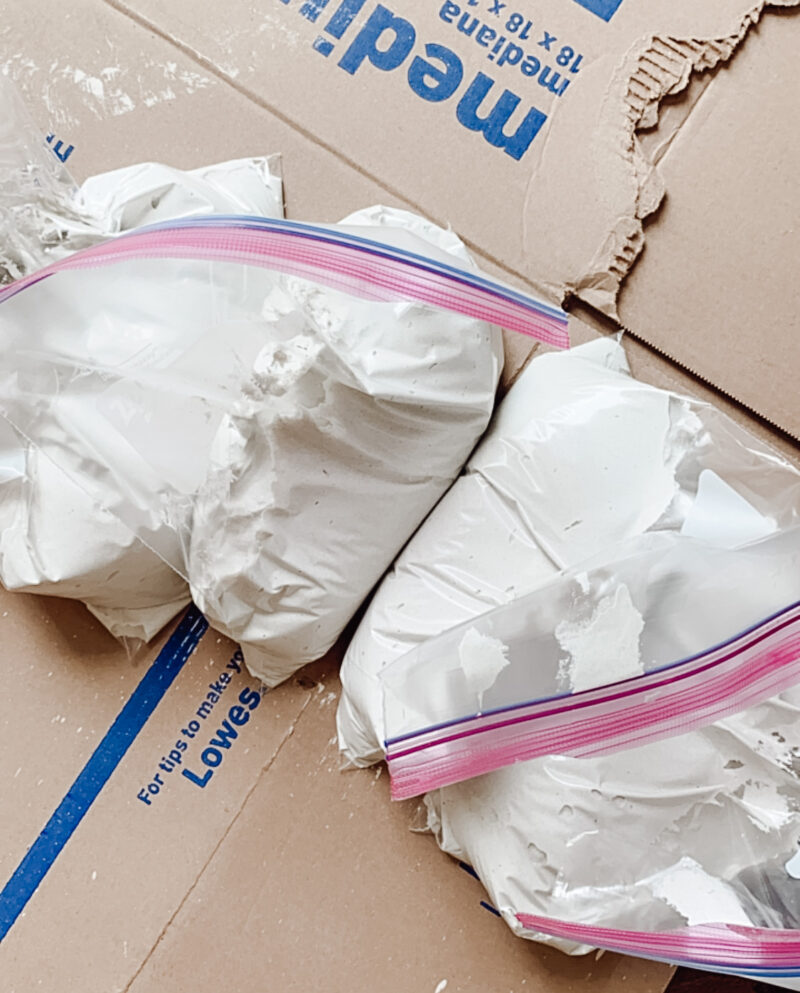
We then put it in ziplock bags. We did end up buying a professional piping bag (looks like a cake decorating bag) but honestly it worked pretty much the same. Both tend to get clogged. I also found the professional bag to be too heavy. Mortar is surprisingly dense and weighs quite a bit. Just be patient. If the grout isn’t coming out, there is likely a chunk stuck near the opening.
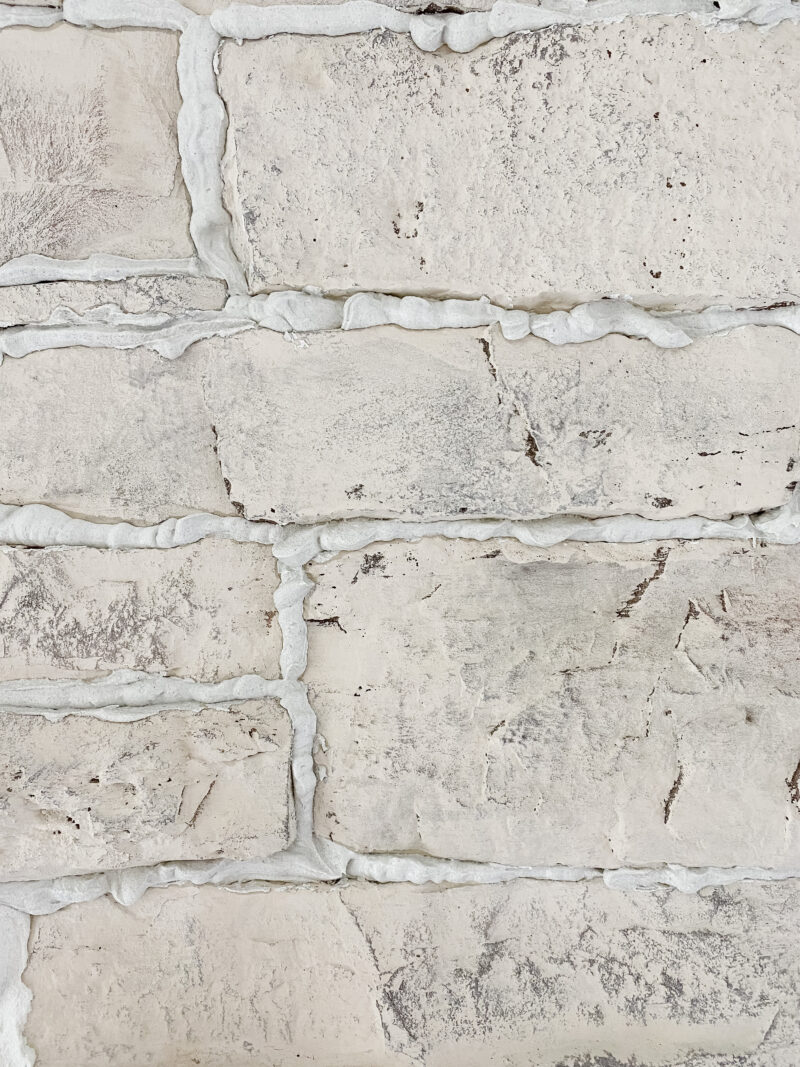
Cut the tip off the corner of the bag and just go for it. Start with a small cut because you always enlarge it if you need more mortar to come out. The issue with stacked stone is that it isn’t symmetric like brick nor are the stones flush with one another. I quickly realized that perfection isn’t the goal. You want this to look messy otherwise it will look like your lines aren’t straight. I hope that makes sense.
The above photo shows what it looks like when you squeeze the mortar on. It’s not pretty. When you wipe it, it takes shape. You can leave as much or as little as you like. The term overgrout means that you’ll leave much more and everything will blend. Some of our gaps were so tight that I just grouted right over the line to make it appear like there was a larger gap. Hence the term overgrout.
Once you grout a section, wait a few minutes and then wipe away the access. I used my finger to wipe it away. They make tools for this but I feel like I have more control using my finger. I will say it was very rough on my hands but oh well. As I wiped it away, I held a styrofoam cup in my other hand so I could wipe the extra from my finger into the cup. Do whatever works for you.
WARNING: This part is extremely messy. I can’t stress that enough. Your hands will be a mess but it’s worth it.
FINISHED GROUT UP CLOSE
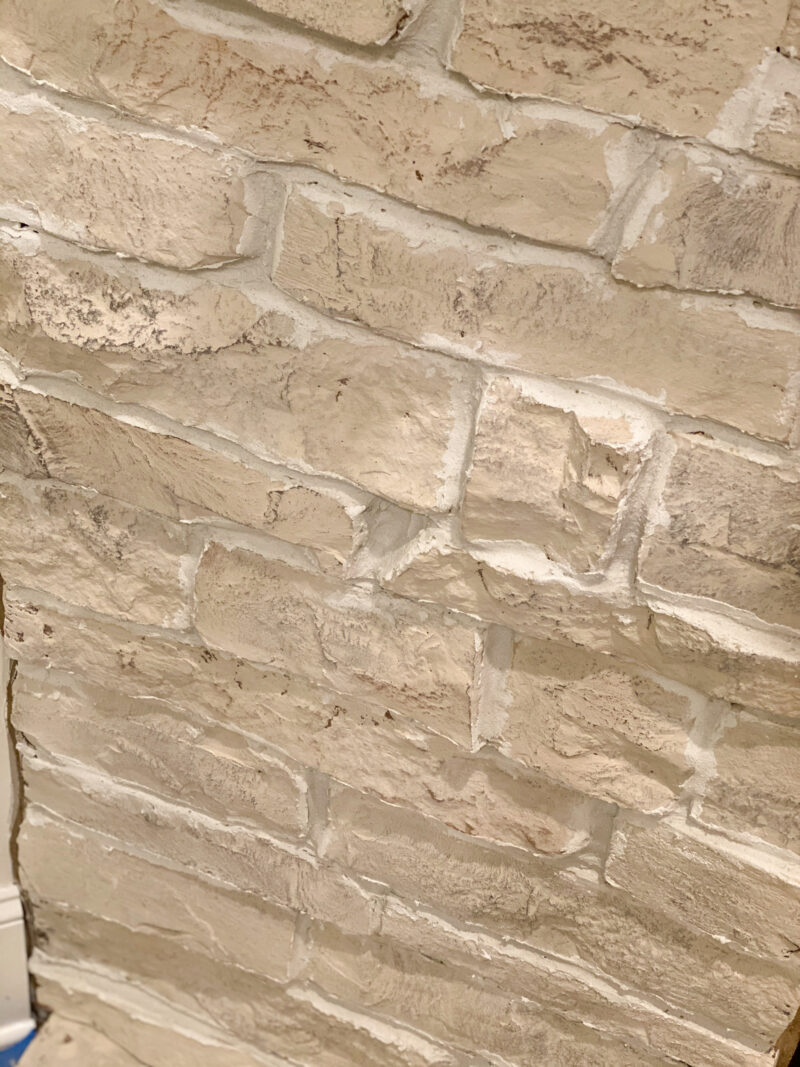
This is a photo fo how it looks once you wipe it away and let it dry. The mortar looks gray as it goes on but dries white. We wanted the contrast. Remember that with stacked stone all of your gaps are different, so overgrouting helps to soften all of that. It gives the illusion that there are larger gaps between the tightly stacked stone.
You can tint your mortar should you want something other than white.
You may also want to grout first and limewash everything the same color if you prefer that look.
HOME STRETCH
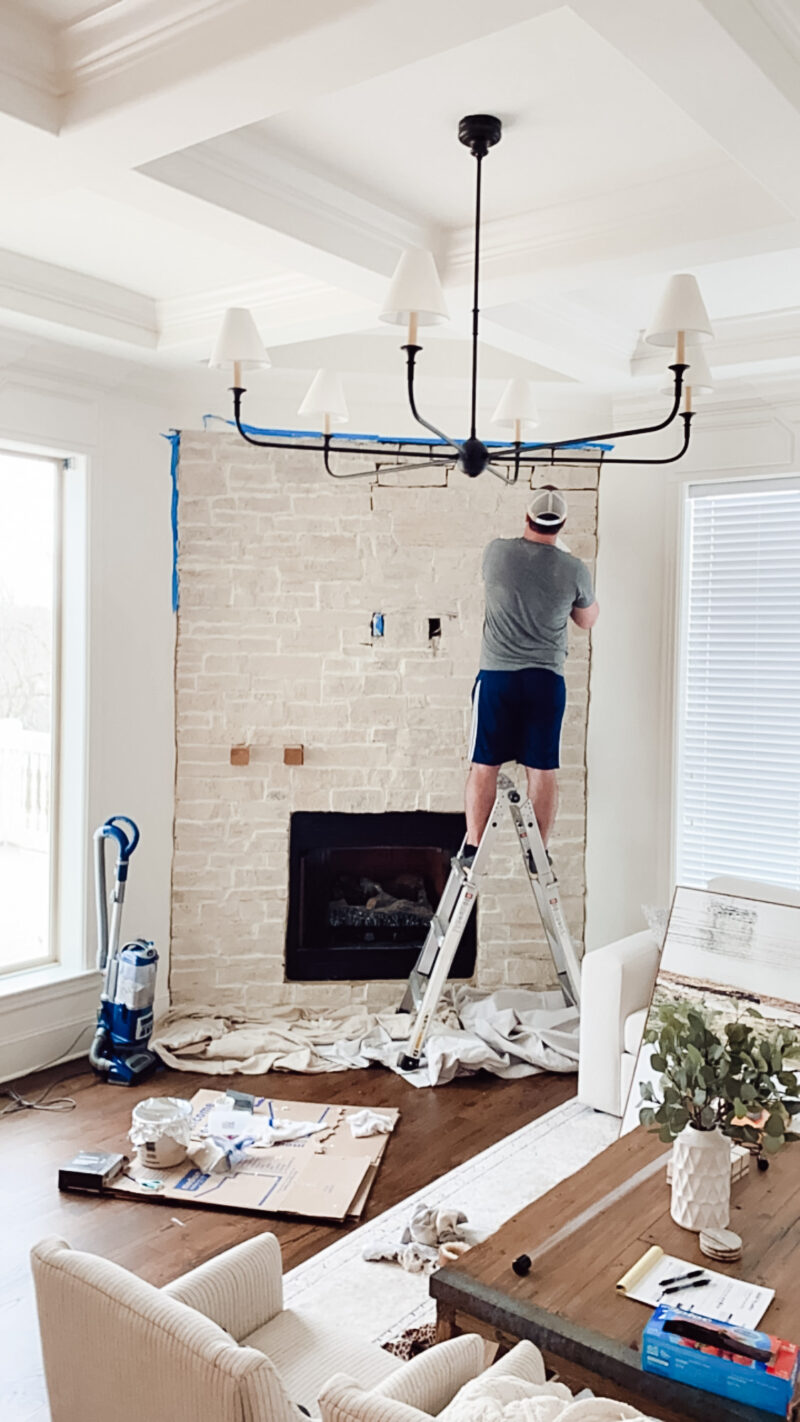
I made it through almost the entire fireplace and then my fingers gave up on me so my hubby swooped in to finish. Grouting took a good portion of day two. It’s a tedious process but it really makes the entire fireplace come alive.
Don’t forget to grout the sides of your stone, too. Do you see those dark lines down the edges. Just add a nice line of grout and spread it carefully with your finger.
If you look to the left of my husband’s shoulder, you can see the grout almost disappears. It dries white and bright. But that gives you an idea of how it would look if you choose grout similar to your stone color.
PAINTING THE HEARTH & TOUCH UPS
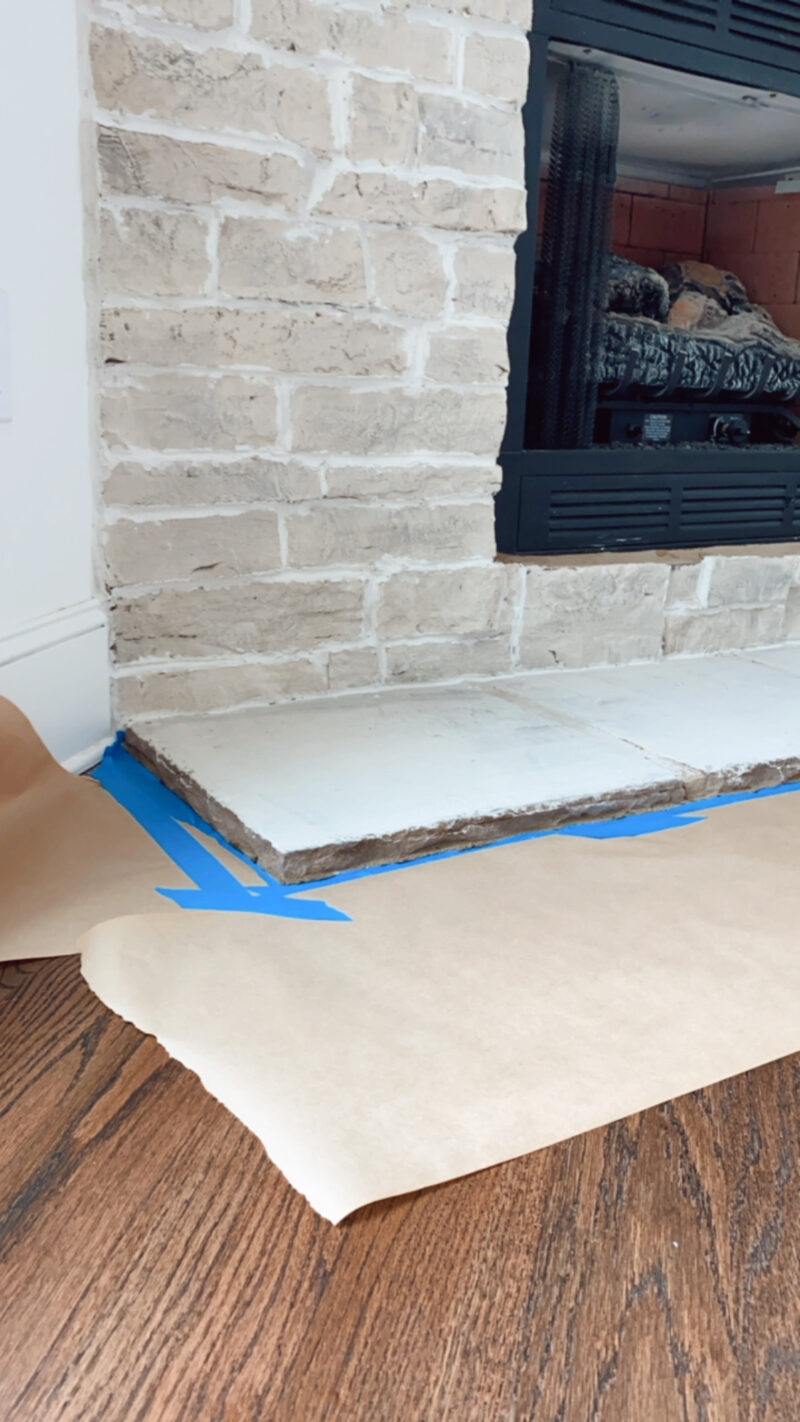
Once your stone is complete, you can get rid of the drop cloths and tackle the hearth. I ended up doing two coats of limewash on ours. I did not wipe any away.
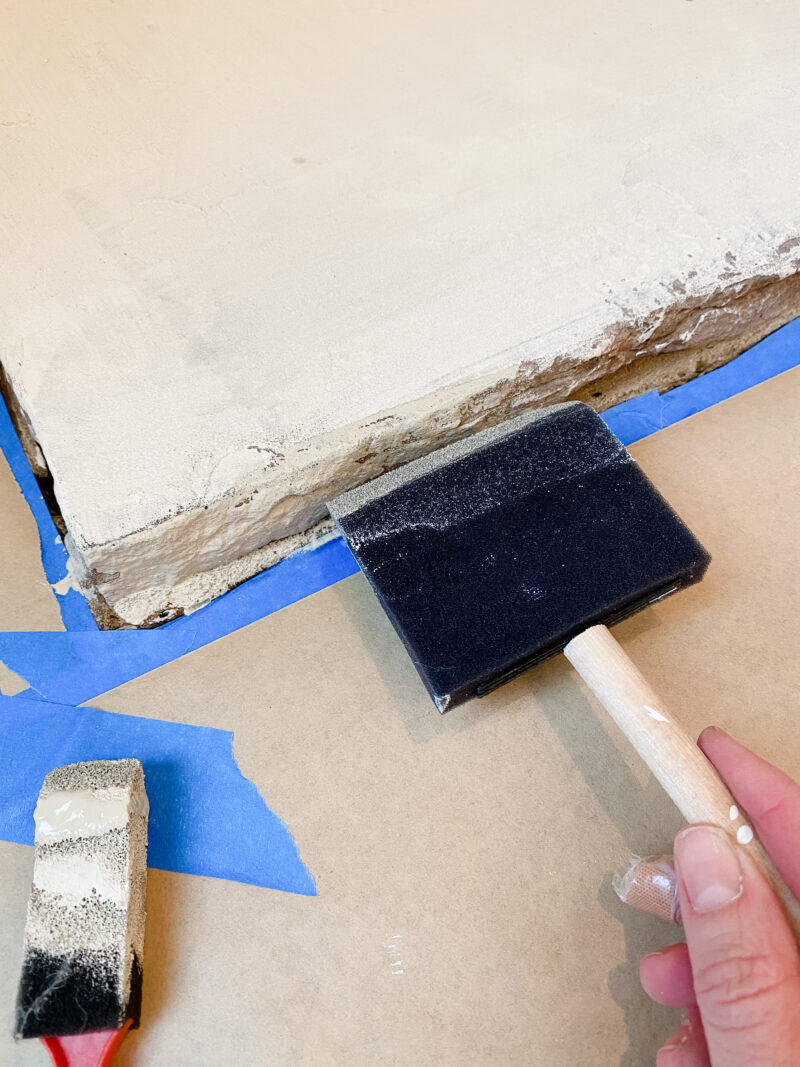
A foam brush comes in handy to do the edges. It is also great for touch ups. I did the hearth and touch ups on the third day. Some of the stones had some dark spots here and there so I was able to go back and just add a dab of the limewash paint. You don’t need to do the 5 step process for touch ups. Adding a little dab works well.
PRO TIP: The bucket of diluted limewash can be covered and used the next day. It does not dry out. We did end up using almost the entire container of limewash. There was just enough for me to touch things up.
TIMING
Looking back with the knowledge I have now, this is the schedule I would recommend:
- Buy supplies ahead of time
- Day 1: Limewash all of the stone (cover extra limewash and save for touch ups)
- Day 2: Grout the fireplace
- Day 3: Touch ups (nice to step away and come back to this with fresh eyes on day 3)
We originally thought we would tint the grout. I am so thankful we didn’t. Had we hired someone, I would have had them tint the grout close to the stone color. That would have been a big mistake because we love the contrast with the white grout. It works well with our space and millwork.
FINAL THOUGHTS ON A LIMEWASH FIREPLACE MAKEOVER

mantel | coffee table | ottomans | tv | chandelier | flameless candles | grid box | stems
I am happy to say that months after doing this project, the stone looks just as it did the day we finished. This weekend project was one of our favorites to date.
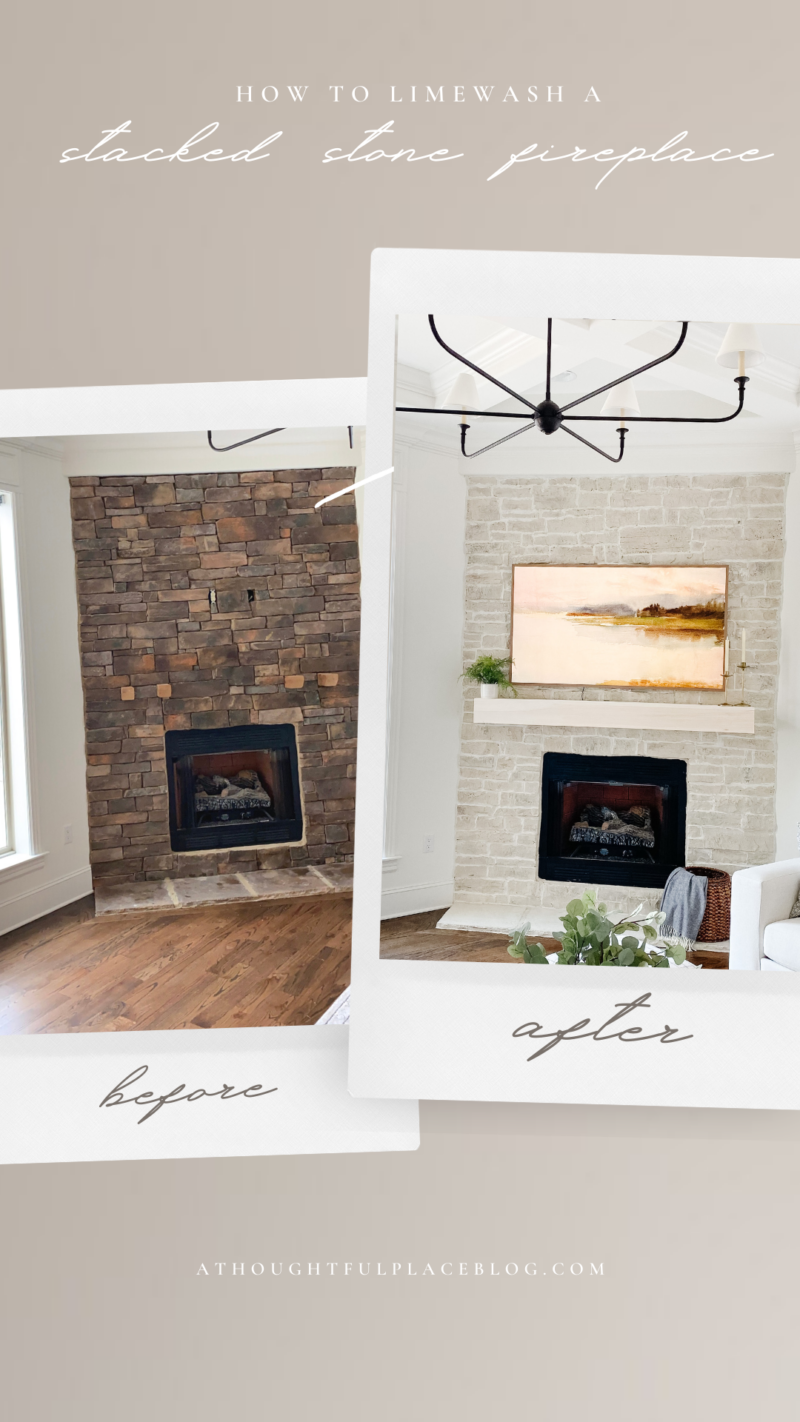
What a difference a couple of days can make. I really hope his was helpful. This project takes very little know-how and more diligence than anything else. And it’s not about making it perfect. It’s about creating an overall beautiful look. Crank up the tunes, take your time, and know it’s not a race. The end product will be so worth it. Let me know if you tackle your stone and how it goes.
*See more before photos of our home here (and this room when we moved in).
This looks great Courtney!
Do you think it would work on stacked stone kitchen backsplash ? It’s a very small stacked stone, meant to be used outdoors, but it came with the house. It stains very easily. Not sure we will stay here and hate to invest in ripping it out and putting a new one in.
I really enjoy your blog and I’m so glad you and your family are enjoying your move.
I think it’s been a blessing for you!
This is one of the most beautiful “before” and “afters” I’ve seen on fireplaces! You did a great job!! Thanks for the lesson too!
You are so welcome, Denise. So happy it’s helpful and thank you for the sweet compliment.
Looks great! Do you think this would work with a brick fireplace?
Thank you! Yes, absolutely. In fact I think the application is even easier on brick.
It turned out so nice! I love the contrast with the white, as well.
Could you tell me what color lime wash you used please?
Would this work on outdoor stone face?
Yes. We did something similar to our exterior stone. Same product.
Hi Courtney! Did you choose the 6inch or 8inch depth for the mantel? I can’t decide which to order! Thank you!
Hi Jenna,
I went with the 8″. I definitely wanted to be able to drape a garland on it during the holidays. Hope that helps.
Your fireplace turned out so well! Did you seal the limewash? How has it aged? I am thinking about doing this but I am worried the limewash will be too chalky and wear off.
How tall all your ceilings and do you have a link for chandelier?
Hi. They are 10′ and the chandelier is from Mcgee and Co. Hope that helps.
We followed this and did the same thing to ours. We used the same mortar as you except the premixed ready to use version of it. Ours didn’t dry white. It is more of a beige color that blends with the stone. Did yours take a few days to turn white? Trying to figure out if we did something wrong. Thanks!
Oh shoot. I think ours looked white a couple of hours later. But to be honest, I often think it would be pretty if it blended in more.
Hi Courtney!
How did you get yours tinted? The guys in the paint dept at Lowe’s were unaware how to accomplish this. The ones they offer come in “Blanco White” or “Avorio White” so they didn’t know how to tell me to get any tint I preferred.
Did not know if adding actual paint of choice was possible to the limewash and water mixture or what.
Thank you!
We used the Romabio and it came with those color tinting choices. Maybe try a different store that carries the line? Good luck with the project.