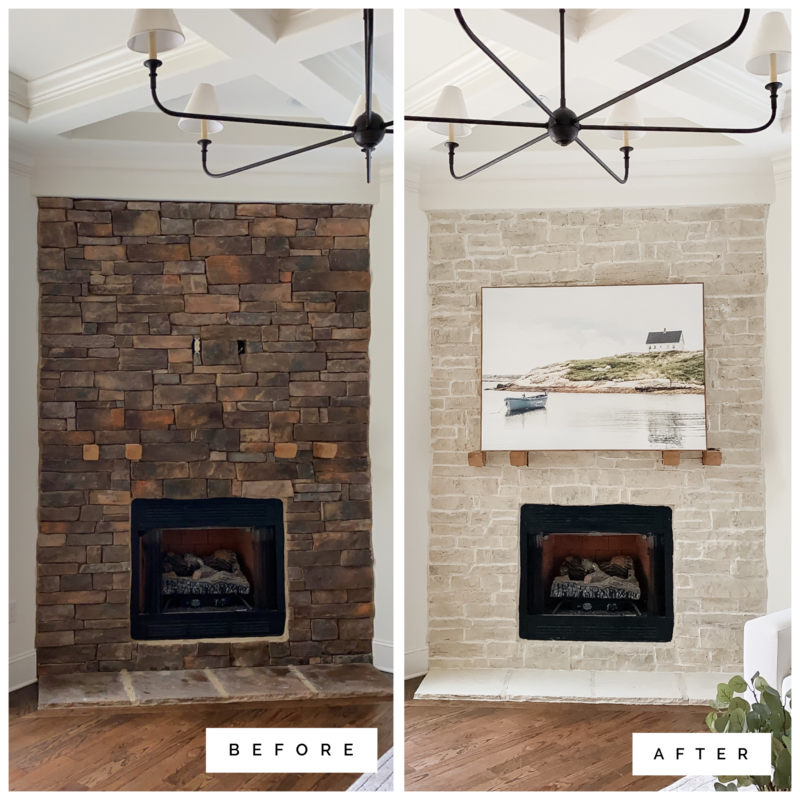
Good morning. I’m beyond excited to share a before and after of our stacked stone fireplace with you all. This was a true labor of love and for those of you asking, step-by-step instructions are coming. We want to finish the entire project and then I will share all of the juicy details. I will say that my dear friend, Catherine, had to give me a serious pep talk half way through. This is the type of project that appears to be a hot mess until you reach the finish line.
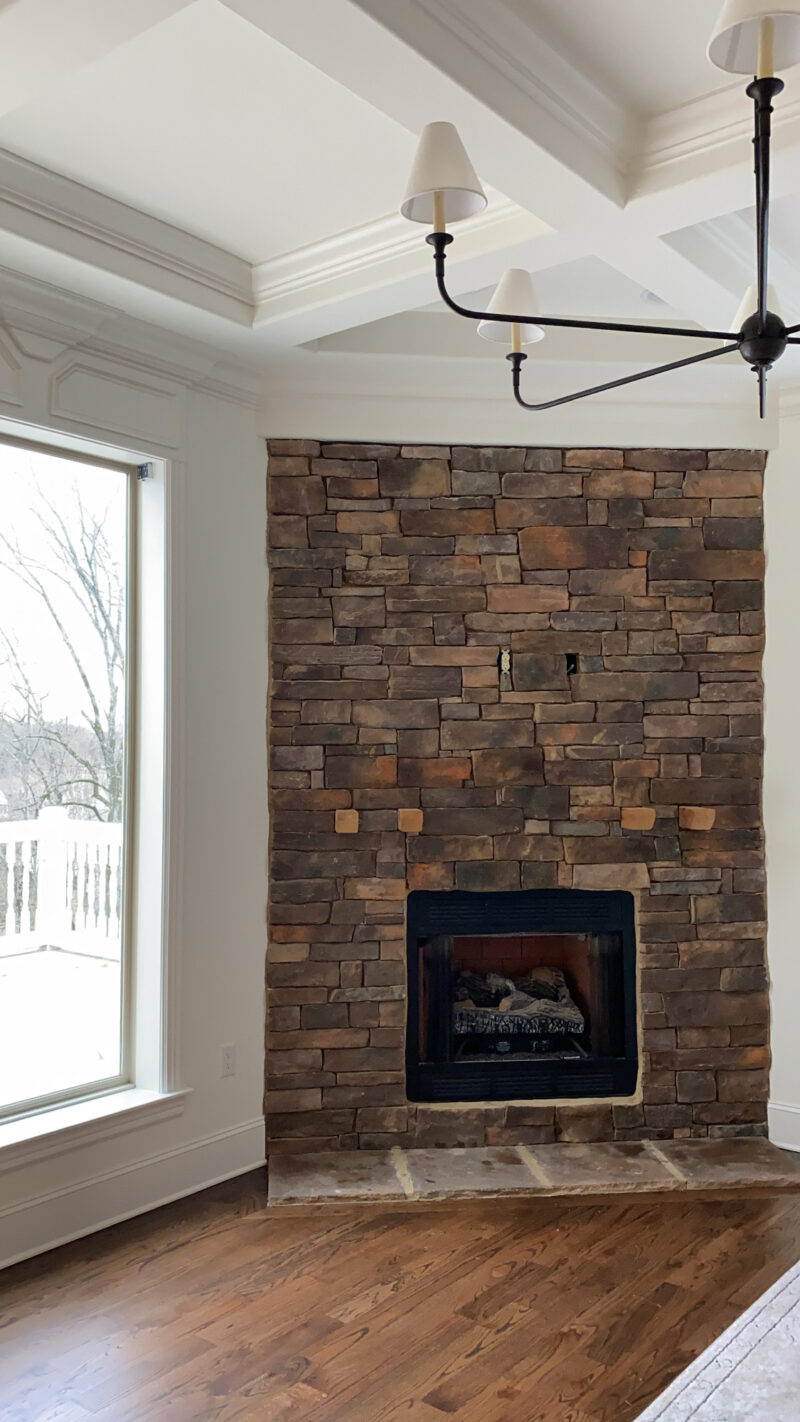
THE FIREPLACE BEFORE

The original stone matched that of what was used on the outside of our home. We had that lime washed by professionals prior to moving in. Someone asked why we didn’t just have this done at the same time. Great question. But to be honest, we were still living in California and taking turns coming back and forth to keep an eye on the painting of both the interior and the exterior. While we knew this wasn’t our style, it was one of many things we knew we would eventually get to and we just weren’t in the frame of mind. The painting and refinishing of the floors were both such major endeavors. And to be honest, we are happy we didn’t rush into it because it gave us some time to figure out the look we wanted.
We also decided to tackle it ourselves because of the expense to have it done. At the end of the day, we need to pick and choose what we budget for hiring out versus rolling up our own sleeves. An added bonus to doing things yourself is that you can adjust and pivot as the project goes. Sometimes you’ll find you change your mind on things. We certainly did with this and it would have been a different outcome had we told a professional what we originally thought we wanted.
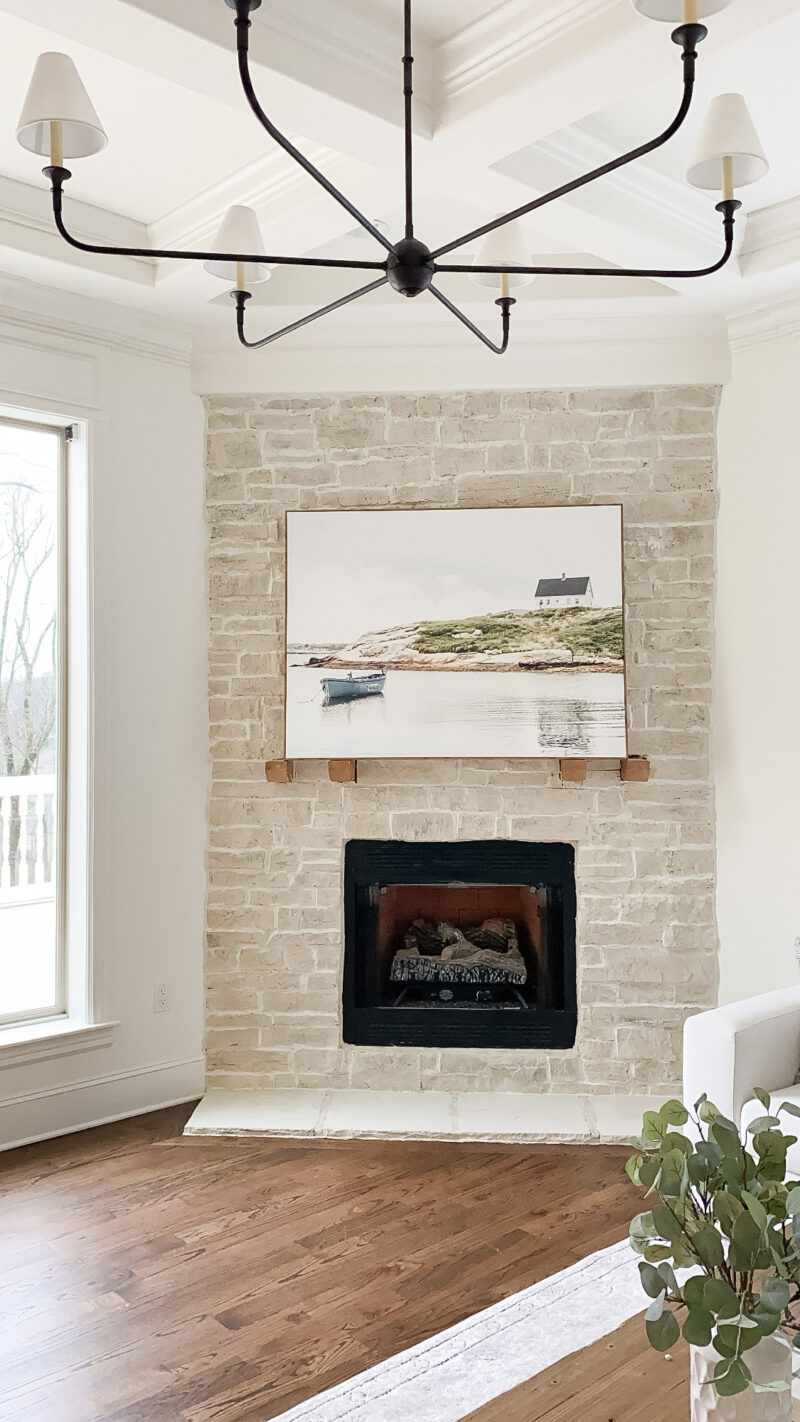
THE FIREPLACE AFTER

I actually wish you could see this in person. It doesn’t photograph as well as I would like. There is still so much texture and variation in the stones. I also love the way it pairs with the beautiful ceiling. Nothing about it is perfect and that was the idea. I think it gives the space some character while not overpowering the room. Overall it was about a three day project (working maybe 4-5 hours a day) and then an hour or so for touch up and clean up. Very doable.
SIDE BY SIDE LOOK AT THE FIREPLACES

WHAT’S NEXT?
- Add a mantel
- Install the Frame TV
- Paint the back of the firebox black
- Enjoy being done!
We will be having the Frame TV installed this week. We are in a unique position where there are no built ins near this area so we are most likely going to hide the box in the mantel itself. At first we were thinking a reclaimed beam would be great. But then a friend suggested this mantel and it’s ideal. It comes in various sizes and stains and the inside is hollow. We are hoping to hide the box right inside of it. I’ve ordered it and it is on the way. The chandelier can be found here.
Once we finish the above to-do list, I will be back with a comprehensive tutorial. It’s been six months since me moved in and it’s fun to take a moment and appreciate all that we have done to make it our own. Sometimes I have to remind myself to do that instead of anticipating the next project. If you need a refresh, this is a look back at some of the spaces when we first bought the home.
FIREPLACE QUESTIONS?
I would love to make the tutorial as helpful as possible so if you have specific questions about the project, please feel free to leave them in the comments below.
Make it a great day.
It looks really, really good! More polished than the old version, and like you said, it works nicely with the ceiling detail. Definitely worth your hard work!
Thank you so much, Tiffany. It was fun to watch it evolve. Have a great week.
This is just beautiful!!! I love it and think it looks perfect in the space. The grouting makes all the difference I think. Well done!
Thank you so much! I agree with the grouting. Only way to get rid of all of the black shadow lines, too. Appreciate the kind words.
i’m curious as to what you originally thought you wanted versus what you ended up with
I cannot wait for the how-tos! And also, what you did to the tiles on the floor. Did you redo those too? Or use paint? I have an ugly “slump stone” fireplace and want to change it. It is a lovely remodel of your fireplace.
This looks so good! I am not a DIY’er but you’ve truly inspired me. My main questions are exactly what supplies do I need? What is the timeline…did this get done in a day or in stages? And then any tips for a true novice? I’m so excited and nervous! Thanks for sharing!!
Thank you for your post on this project. What a nice update, the lighter color looks great.
For questions: how long did the project take? What products did you use? What was the biggest challenge? Anything unexpected happen? Cost (of course I had to ask)? Anything you would do differently if you had to do the project again? Any advice for those that want to tackle this?
Sorry for the long list of questions. I would like to do this to my fireplace.
Courtney this is beautiful! I never thought a fireplace could be made to look this elegant and beautiful! Beautiful job!
Really makes your beautiful floors stand out.
Looks really lovely. Well done.
If it’s not to late to answer these questions in your upcoming post, I’d like to know if any of the products you used required you to wear protection from fumes. Also, did you reach out to a professional for a quote to have the job done? I am very sensitive to paint fumes and other products used in home improvement and wonder if completing a similar job in our vacation home would be best left to a professional. Your fireplace lots amazing!
Wow, it looks amazing!!! It really brightens the room up even more. You did such a great job. Can’t wait to see it all done.
What is the name of the lime wash product you used and what supplies were needed? Also, how did you “clean” your fireplace before lime washing? Thank you kindly! Eagerly awaiting your tutorial. We plan to do this in our 1970’s lower level fireplace, and have been wanting to do so for years.
Beautiful and great transformation. Interested to know what process/products you use. I have this project to do to our fireplace and looking into how to tackle it. Love what you did. Thanks,
Did you ever publish the tutorial? I can’t find it and our fireplace is exactly like yours 🙂 BEAUTIFUL job!
Yes! just sent you the link but you can always search “fireplace” and it will come up. Good luck with your project. Exciting!